

Blog
Replace a Shower Door Sweep: Step-by-Step | Daltex Glass

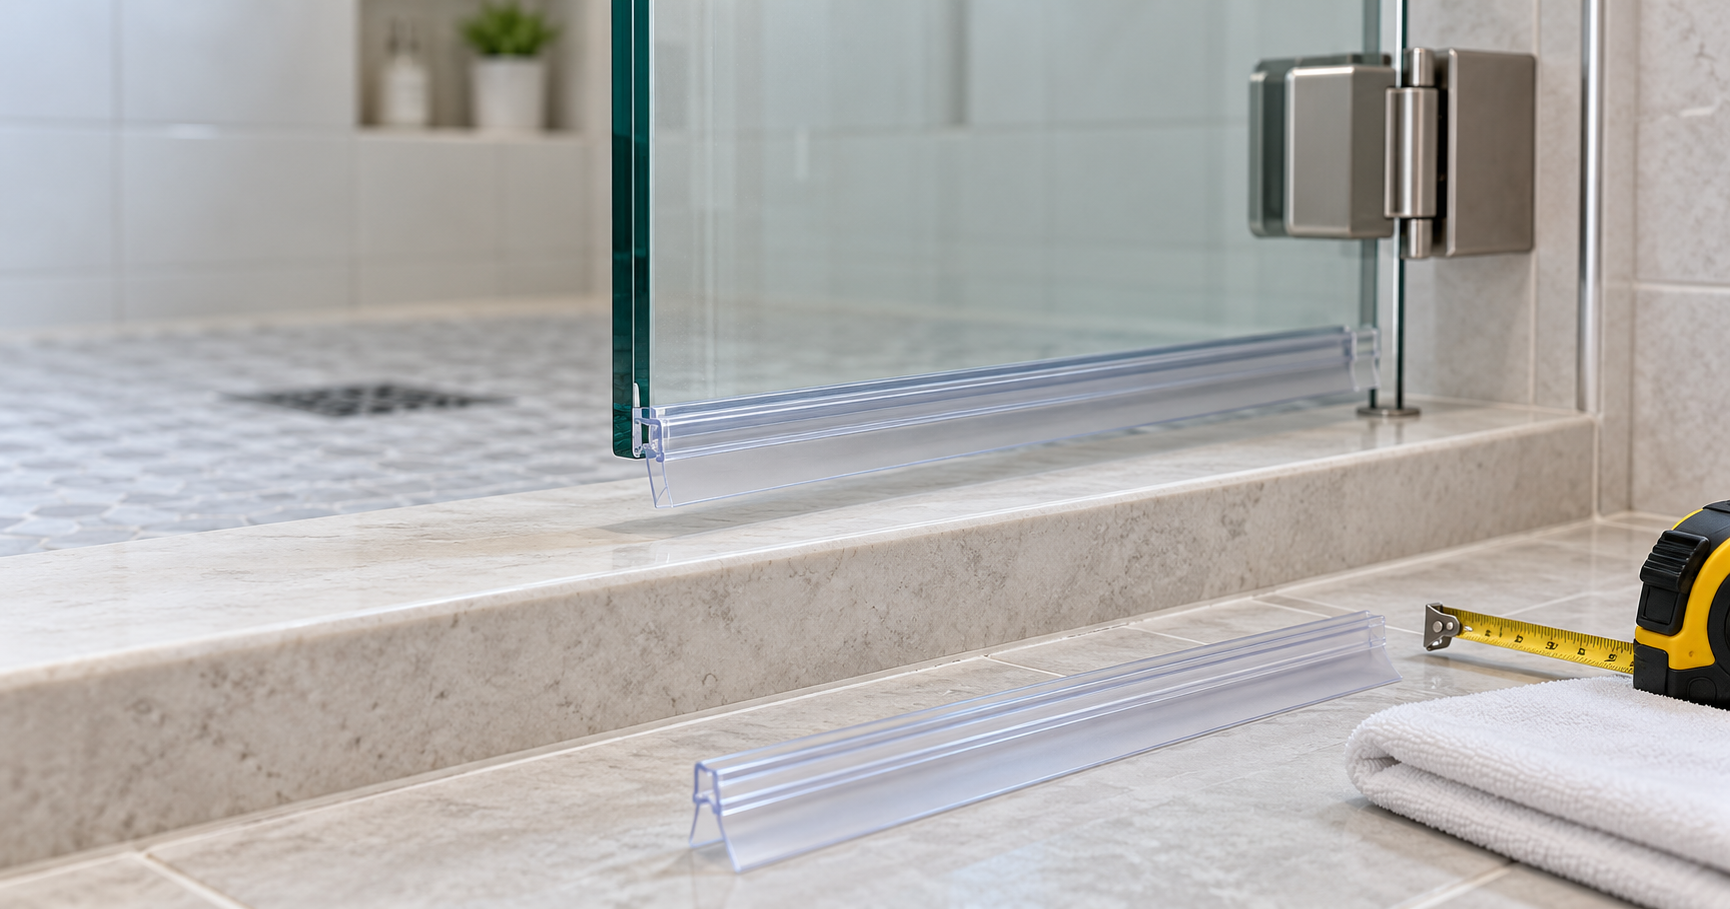


Most snap-on sweeps can be replaced without removing the shower door. However, framed, sliding and metal-channel systems may require a different removal and installation method.
To replace a shower door sweep, remove the old seal, clean and dry the glass edge, measure the glass thickness and door width, cut the new sweep to length, and press or slide it onto the bottom of the door. The flexible fin or drip rail should face the shower interior so that water is directed back into the enclosure.
What Is a Shower Door Sweep?
A shower door sweep is a flexible strip installed along the bottom edge of a shower door. It helps control water by closing the gap between the door and the curb, threshold or shower base.
Many sweeps also include a drip rail that redirects water running down the glass toward the inside of the enclosure. Most clear sweeps are made from vinyl, PVC or another flexible plastic.
A bottom sweep is only one component of the enclosure. Hinges, handles, guides, jambs and other shower hardware must also remain properly aligned for the door to close and seal correctly.
When Should You Replace a Shower Door Sweep?
A shower door sweep should be replaced when it no longer grips the glass or controls water effectively.
Common signs include:
- Cracks, tears or missing sections
- A loose channel that slides off the glass
- A bent fin that no longer returns to its original position
- Water escaping beneath the door
- Heavy mineral deposits that cannot be removed
- Cloudy or discoloured material
- Excessive dragging against the threshold
- A drip rail that points in the wrong direction
- A sweep that has become hard or brittle
Cleaning may improve a sweep covered with soap residue or mineral deposits. Replacement is usually better when the material has permanently changed shape or lost its grip.
What Type of Shower Door Sweep Do You Need?
The correct replacement depends on the door design, glass thickness, gap size and direction of movement.
Frameless Glass Door Sweep
A frameless sweep normally has a rigid U-shaped channel that snaps directly onto the bottom of the glass. Flexible fins extend beneath the door, and some models include an angled drip rail.
The channel must match the exact glass thickness. A channel designed for 3/8-inch glass may not grip 1/4-inch glass securely and may not fit 1/2-inch glass.
Framed Shower Door Sweep
A framed shower door may use a vinyl insert inside an aluminium rail. The sweep may slide into a groove or be held by screws.
In some systems, only the flexible insert is replaced. In others, the complete metal rail and seal are replaced together.
Sliding Shower Door Sweep
Sliding shower doors may use bottom guides, vertical overlap seals or soft fins rather than a standard snap-on bottom sweep. The replacement must not interfere with the rollers, track or overlap between the panels.
If the door shakes, drags or leaves the guide, the issue may involve replacement parts rather than the sweep alone.
Sweep With a Drip Rail
A drip-rail sweep has an angled projection that collects water running down the door and directs it toward the shower interior.
The drip rail must face inward. Installing it toward the bathroom can direct water outside the enclosure.
Tools and Materials You May Need
Collect the necessary tools before removing the old sweep:
- Replacement shower door sweep
- Tape measure
- Marker or pencil
- Fine-tooth hacksaw, utility shears or appropriate cutting tool
- Non-abrasive glass cleaner
- Clean cloths
- Plastic scraper
- Fine file or sandpaper
- Protective gloves
- Safety glasses
- Towels
The correct cutting tool depends on the material. A rigid plastic channel may require a fine-tooth saw, while a soft vinyl insert may be cut with heavy-duty shears.
Avoid using metal tools directly against an exposed tempered-glass edge.
How to Measure for a Replacement Shower Door Sweep
Accurate measurements are essential because shower door sweeps are not universal.
Measure the Glass Thickness
Measure the thickness of the glass with a suitable measuring tool. Common frameless shower glass thicknesses include 1/4 inch, 3/8 inch and 1/2 inch, but the actual measurement should always be confirmed.
The rigid channel of the new sweep must match this thickness. A loose channel may fall off, while an undersized channel can be difficult to install and may place pressure on the glass.
Measure the Door Width
Measure the full width of the existing sweep or the bottom edge of the door. Record the measurement before removing the old part.
Many replacement sweeps are supplied in longer standard lengths and must be cut to fit.
Measure the Bottom Gap
Measure the distance between the bottom of the door and the threshold or curb. Check the gap near both ends and in the centre.
A small difference may be normal, but a large variation can indicate that the door is sagging, the curb is uneven or the hinges need adjustment.
The flexible fin should close the gap without being heavily compressed.
Compare the Existing Profile
If possible, remove a small section or take a clear end-view photograph of the existing sweep. Compare the shape of the channel, fins and drip rail with the replacement.
Two sweeps can look similar from the side while being designed for different glass thicknesses or gaps.
How to Replace a Shower Door Sweep
Step 1: Confirm Where the Water Is Escaping
Run the shower briefly and observe the bottom and sides of the door. Confirm that water is passing beneath the sweep rather than through a vertical jamb, hinge opening, curb joint or failed silicone seal.
Replacing the bottom sweep will not correct a leak coming from another part of the enclosure.
Step 2: Protect the Shower Area
Place towels on the shower floor and outside the enclosure. The towels protect the surfaces, collect moisture and provide a safer working area.
Open the door to a comfortable position. Support the door if it moves easily, but do not place tools or heavy objects against the glass.
Step 3: Remove the Old Sweep
For a snap-on frameless sweep, begin at one end and pull the channel downward or slide it horizontally off the glass. The direction depends on the sweep profile and available clearance.
Work slowly across the door. Do not twist the sweep aggressively because this can place uneven force on the glass edge.
For a framed or metal-channel sweep, inspect the rail for screws, clips or removable end caps. Remove these components before attempting to pull out the vinyl insert.
If the sweep does not move with moderate pressure, check for concealed fasteners, adhesive or mineral buildup.
Step 4: Clean the Glass Edge
Remove soap residue, adhesive, mineral deposits and debris from the bottom edge of the glass.
Use a non-abrasive cleaner and a plastic scraper when necessary. Avoid blades or metal tools that could scratch the glass or damage the edge.
Dry the glass completely before installing the replacement. Moisture or residue can prevent the new channel from gripping properly.
Step 5: Compare the New and Old Sweeps
Place the old and new sweeps next to each other. Confirm that the new channel has the same internal width and that the flexible fins extend far enough to close the bottom gap.
Also check the direction of the drip rail. The replacement profile does not need to look identical in every detail, but it must suit the same door movement and gap.
Step 6: Mark the Required Length
Use the old sweep as a template if it fitted correctly. Otherwise, transfer the door-width measurement to the new sweep.
Mark a straight cutting line. The finished sweep should cover the full width of the door without extending far enough to strike the wall, jamb or fixed glass panel.
A gap at either end can allow water to escape.
Step 7: Cut the New Sweep
Cut the sweep using a tool appropriate for its material. Support the channel while cutting to reduce cracking or distortion.
For a rigid plastic profile, use a fine-tooth saw and make a slow, square cut. For flexible vinyl, heavy-duty shears may be suitable.
Smooth rough edges with a fine file or sandpaper. Remove all plastic fragments before installation.
Step 8: Position the Sweep Correctly
Hold the sweep beneath the door with the drip rail or main water-directing fin facing the shower interior.
Before pressing it into position, confirm that the channel is centred and that both ends align with the door edges.
Installing the sweep backwards is one of the most common causes of continued leakage.
Step 9: Press or Slide the Sweep Onto the Glass
Starting at one end, press the channel evenly onto the bottom edge of the glass. Continue gradually across the width of the door.
Some profiles install more easily by sliding them from the side. Follow the product design rather than forcing the sweep vertically.
Do not strike the sweep with a metal hammer. If light hand pressure is not enough, recheck the glass thickness and channel size.
A small amount of water may help certain slide-on profiles move along the glass. Avoid applying oils, grease or permanent adhesive unless the manufacturer specifically requires it.
Step 10: Check the Door Movement
Open and close the door slowly. The flexible fin should make light contact with the curb or threshold without folding, binding or dragging heavily.
Excessive contact can make the door difficult to operate and may pull the sweep away from the glass.
If the sweep catches at one end, check whether the door is level and whether the bottom gap changes across its width.
Step 11: Test for Leaks
Close the door and direct water toward the normal shower area. Avoid spraying high-pressure water directly into door gaps because most shower enclosures are designed to control ordinary water flow, not concentrated spray.
Inspect the bottom edge, corners and junctions with fixed panels. Check whether the drip rail returns water to the enclosure.
If water still escapes, determine whether it passes beneath the sweep, around its end or through another opening.
Which Way Should a Shower Door Sweep Face?
The drip rail and water-directing fin should normally face the inside of the shower. This position allows water running down the glass to return to the shower base.
Some sweeps have two fins or a symmetrical profile, so their orientation may be less obvious. Examine the old sweep, the product profile and the position of the threshold before installation.
The sweep should not direct water toward the bathroom floor or prevent the door from closing.
Can You Replace a Shower Door Sweep Without Removing the Door?
Most snap-on and slide-on sweeps can be replaced while the shower door remains installed. The door only needs enough clearance for the old sweep to be removed and the new one positioned safely.
Door removal may be necessary when:
- A wall or fixed panel blocks side access
- The sweep is secured inside a metal frame
- The door cannot remain stable while open
- The bottom edge is difficult to reach
- Hinges or other hardware also require repair
Frameless glass doors can be heavy. Removing one without suitable support and experience can damage the glass, hinges or surrounding surfaces.
Common Shower Door Sweep Replacement Mistakes
Buying the Wrong Channel Size
Glass thickness determines whether the sweep grips the door. A profile that looks correct may still have an incompatible channel.
Always measure the glass instead of estimating its thickness.
Ignoring the Gap Size
The sweep may fit the glass but still fail to reach the threshold. Measure both the glass and the gap before selecting a replacement.
Installing the Sweep Backwards
A reversed drip rail can send water toward the bathroom. Confirm the orientation before pressing the channel fully into place.
Cutting the Sweep Too Short
Even a small opening near the edge of the door can allow water through. Measure twice before cutting.
Using Excessive Force
A sweep that requires heavy impact may be the wrong size. Striking or twisting a channel against tempered glass can damage the glass edge.
Using Adhesive Unnecessarily
Most frameless snap-on sweeps rely on a correctly sized friction-fit channel. Adhesive can make future replacement more difficult and may not solve a poor fit.
Expecting the Sweep to Correct Door Misalignment
A new sweep cannot repair loose hinges, a sagging door or an uneven frame. The door should be adjusted before fitting a new seal.
Why Does the Shower Door Still Leak After Replacing the Sweep?
A new sweep may not stop the leak if the water is coming from another location.
Possible causes include:
- Incorrect sweep profile
- Insufficient fin length
- Sweep installed backwards
- Door out of alignment
- Loose or damaged hinges
- Failed silicone around the curb
- Threshold sloping toward the bathroom
- An open gap near the wall or fixed panel
- Water directed forcefully at the door
- A missing vertical seal
- Damaged bottom guide on a sliding door
Custom shower enclosures require the glass, hardware, seals, curb and drainage surfaces to work together. Inspecting only the bottom sweep may overlook the actual source of the leak.
How to Maintain a New Shower Door Sweep
Clean the sweep regularly with a mild, non-abrasive cleaner. Soap residue and mineral buildup can make the flexible material stiff or prevent the fins from sitting correctly.
After cleaning, rinse the profile and wipe it dry. Avoid harsh chemicals or abrasive pads that can cloud or damage clear vinyl.
Check the sweep periodically for movement, cracking and loss of contact. Early adjustment can prevent a loose channel from falling off or allowing repeated water exposure outside the enclosure.
When Should You Contact a Glass Professional?
Professional inspection may be appropriate when:
- The glass edge is chipped
- The shower door is sagging
- Hinges or brackets are loose
- The door strikes a fixed panel
- The replacement sweep does not stay attached
- Water is entering around the frame or curb
- The door must be removed for access
- The required profile cannot be identified
- The enclosure uses specialised commercial hardware
A damaged glass edge should not be covered by a new sweep without assessment. Daltex Glass evaluates the complete enclosure when glass repair involves damaged doors, panels or supporting hardware.
Frequently Asked Questions
How do I know which shower door sweep to buy?
Measure the glass thickness, door width and gap beneath the door. Compare the old profile with the new channel, fins and drip rail. Also confirm whether the door is framed, frameless, swinging or sliding.
Are shower door sweeps universal?
No. Shower door sweeps vary by glass thickness, channel size, profile, fin length, door type and installation method.
Can I cut a shower door sweep to fit?
Yes. Most vinyl and PVC sweeps can be trimmed to length using a suitable cutting tool. Make a straight cut and smooth any rough edges before installation.
How tight should a shower door sweep be?
The channel should grip the glass securely without requiring excessive force. The flexible fin should lightly contact the threshold without making the door difficult to move.
Which way does the shower door sweep go?
The drip rail or main water-directing fin should normally face the shower interior. This helps return water running down the glass to the shower base.
Do I need to remove the shower door?
Usually not. Many frameless sweeps can be pulled or slid from the glass while the door remains installed. Some framed systems require additional disassembly.
Should I glue the sweep to the glass?
Most snap-on sweeps do not require adhesive. Use adhesive only when it is specified for the particular product and installation.
How often should a shower door sweep be replaced?
There is no fixed replacement schedule. Replace it when it becomes cracked, brittle, loose, permanently distorted or unable to control water.
Why is the new sweep difficult to install?
The channel may be too small for the glass, the glass edge may still have residue, or the sweep may need to be installed from the side. Confirm the measurements before applying more pressure.
Can a shower door sweep stop every leak?
No. A sweep controls water at the bottom of the door. It cannot correct leaks caused by failed silicone, misaligned glass, damaged hardware, open vertical gaps or an incorrectly sloped threshold.
SEO Title: Replace a Shower Door Sweep: Step-by-Step | Daltex Glass
Meta Description: Learn how to replace a shower door sweep, choose the correct size, remove the old seal, install the new sweep and prevent water leaks around the enclosure.
URL Slug: how-to-replace-shower-door-sweep
Primary Keyword: replace shower door sweep
Secondary Keywords: shower door sweep replacement, shower door sweep installation, install shower door sweep, glass shower door sweep replacement, frameless shower door sweep replacement, shower door bottom seal, replace shower door seal
Tags: Shower Door Sweep, Shower Door Seal, Shower Door Repair, Frameless Shower Door, Shower Hardware, Glass Shower Enclosure
How to Replace a Shower Door Sweep: Step-by-Step Guide
To replace a shower door sweep, remove the old seal, clean and dry the glass edge, measure the glass thickness and door width, cut the new sweep to length, and press or slide it onto the bottom of the door. The flexible fin or drip rail should face the shower interior so that water is directed back into the enclosure.
Most snap-on sweeps can be replaced without removing the shower door. However, framed, sliding and metal-channel systems may require a different removal and installation method.
What Is a Shower Door Sweep?
A shower door sweep is a flexible strip installed along the bottom edge of a shower door. It helps control water by closing the gap between the door and the curb, threshold or shower base.
Many sweeps also include a drip rail that redirects water running down the glass toward the inside of the enclosure. Most clear sweeps are made from vinyl, PVC or another flexible plastic.
A bottom sweep is only one component of the enclosure. Hinges, handles, guides, jambs and other shower hardware must also remain properly aligned for the door to close and seal correctly.
When Should You Replace a Shower Door Sweep?
A shower door sweep should be replaced when it no longer grips the glass or controls water effectively.
Common signs include:
- Cracks, tears or missing sections
- A loose channel that slides off the glass
- A bent fin that no longer returns to its original position
- Water escaping beneath the door
- Heavy mineral deposits that cannot be removed
- Cloudy or discoloured material
- Excessive dragging against the threshold
- A drip rail that points in the wrong direction
- A sweep that has become hard or brittle
Cleaning may improve a sweep covered with soap residue or mineral deposits. Replacement is usually better when the material has permanently changed shape or lost its grip.
What Type of Shower Door Sweep Do You Need?
The correct replacement depends on the door design, glass thickness, gap size and direction of movement.
Frameless Glass Door Sweep
A frameless sweep normally has a rigid U-shaped channel that snaps directly onto the bottom of the glass. Flexible fins extend beneath the door, and some models include an angled drip rail.
The channel must match the exact glass thickness. A channel designed for 3/8-inch glass may not grip 1/4-inch glass securely and may not fit 1/2-inch glass.
Framed Shower Door Sweep
A framed shower door may use a vinyl insert inside an aluminium rail. The sweep may slide into a groove or be held by screws.
In some systems, only the flexible insert is replaced. In others, the complete metal rail and seal are replaced together.
Sliding Shower Door Sweep
Sliding shower doors may use bottom guides, vertical overlap seals or soft fins rather than a standard snap-on bottom sweep. The replacement must not interfere with the rollers, track or overlap between the panels.
If the door shakes, drags or leaves the guide, the issue may involve replacement parts rather than the sweep alone.
Sweep With a Drip Rail
A drip-rail sweep has an angled projection that collects water running down the door and directs it toward the shower interior.
The drip rail must face inward. Installing it toward the bathroom can direct water outside the enclosure.
Tools and Materials You May Need
Collect the necessary tools before removing the old sweep:
- Replacement shower door sweep
- Tape measure
- Marker or pencil
- Fine-tooth hacksaw, utility shears or appropriate cutting tool
- Non-abrasive glass cleaner
- Clean cloths
- Plastic scraper
- Fine file or sandpaper
- Protective gloves
- Safety glasses
- Towels
The correct cutting tool depends on the material. A rigid plastic channel may require a fine-tooth saw, while a soft vinyl insert may be cut with heavy-duty shears.
Avoid using metal tools directly against an exposed tempered-glass edge.
How to Measure for a Replacement Shower Door Sweep
Accurate measurements are essential because shower door sweeps are not universal.
Measure the Glass Thickness
Measure the thickness of the glass with a suitable measuring tool. Common frameless shower glass thicknesses include 1/4 inch, 3/8 inch and 1/2 inch, but the actual measurement should always be confirmed.
The rigid channel of the new sweep must match this thickness. A loose channel may fall off, while an undersized channel can be difficult to install and may place pressure on the glass.
Measure the Door Width
Measure the full width of the existing sweep or the bottom edge of the door. Record the measurement before removing the old part.
Many replacement sweeps are supplied in longer standard lengths and must be cut to fit.
Measure the Bottom Gap
Measure the distance between the bottom of the door and the threshold or curb. Check the gap near both ends and in the centre.
A small difference may be normal, but a large variation can indicate that the door is sagging, the curb is uneven or the hinges need adjustment.
The flexible fin should close the gap without being heavily compressed.
Compare the Existing Profile
If possible, remove a small section or take a clear end-view photograph of the existing sweep. Compare the shape of the channel, fins and drip rail with the replacement.
Two sweeps can look similar from the side while being designed for different glass thicknesses or gaps.
How to Replace a Shower Door Sweep
Step 1: Confirm Where the Water Is Escaping
Run the shower briefly and observe the bottom and sides of the door. Confirm that water is passing beneath the sweep rather than through a vertical jamb, hinge opening, curb joint or failed silicone seal.
Replacing the bottom sweep will not correct a leak coming from another part of the enclosure.
Step 2: Protect the Shower Area
Place towels on the shower floor and outside the enclosure. The towels protect the surfaces, collect moisture and provide a safer working area.
Open the door to a comfortable position. Support the door if it moves easily, but do not place tools or heavy objects against the glass.
Step 3: Remove the Old Sweep
For a snap-on frameless sweep, begin at one end and pull the channel downward or slide it horizontally off the glass. The direction depends on the sweep profile and available clearance.
Work slowly across the door. Do not twist the sweep aggressively because this can place uneven force on the glass edge.
For a framed or metal-channel sweep, inspect the rail for screws, clips or removable end caps. Remove these components before attempting to pull out the vinyl insert.
If the sweep does not move with moderate pressure, check for concealed fasteners, adhesive or mineral buildup.
Step 4: Clean the Glass Edge
Remove soap residue, adhesive, mineral deposits and debris from the bottom edge of the glass.
Use a non-abrasive cleaner and a plastic scraper when necessary. Avoid blades or metal tools that could scratch the glass or damage the edge.
Dry the glass completely before installing the replacement. Moisture or residue can prevent the new channel from gripping properly.
Step 5: Compare the New and Old Sweeps
Place the old and new sweeps next to each other. Confirm that the new channel has the same internal width and that the flexible fins extend far enough to close the bottom gap.
Also check the direction of the drip rail. The replacement profile does not need to look identical in every detail, but it must suit the same door movement and gap.
Step 6: Mark the Required Length
Use the old sweep as a template if it fitted correctly. Otherwise, transfer the door-width measurement to the new sweep.
Mark a straight cutting line. The finished sweep should cover the full width of the door without extending far enough to strike the wall, jamb or fixed glass panel.
A gap at either end can allow water to escape.
Step 7: Cut the New Sweep
Cut the sweep using a tool appropriate for its material. Support the channel while cutting to reduce cracking or distortion.
For a rigid plastic profile, use a fine-tooth saw and make a slow, square cut. For flexible vinyl, heavy-duty shears may be suitable.
Smooth rough edges with a fine file or sandpaper. Remove all plastic fragments before installation.
Step 8: Position the Sweep Correctly
Hold the sweep beneath the door with the drip rail or main water-directing fin facing the shower interior.
Before pressing it into position, confirm that the channel is centred and that both ends align with the door edges.
Installing the sweep backwards is one of the most common causes of continued leakage.
Step 9: Press or Slide the Sweep Onto the Glass
Starting at one end, press the channel evenly onto the bottom edge of the glass. Continue gradually across the width of the door.
Some profiles install more easily by sliding them from the side. Follow the product design rather than forcing the sweep vertically.
Do not strike the sweep with a metal hammer. If light hand pressure is not enough, recheck the glass thickness and channel size.
A small amount of water may help certain slide-on profiles move along the glass. Avoid applying oils, grease or permanent adhesive unless the manufacturer specifically requires it.
Step 10: Check the Door Movement
Open and close the door slowly. The flexible fin should make light contact with the curb or threshold without folding, binding or dragging heavily.
Excessive contact can make the door difficult to operate and may pull the sweep away from the glass.
If the sweep catches at one end, check whether the door is level and whether the bottom gap changes across its width.
Step 11: Test for Leaks
Close the door and direct water toward the normal shower area. Avoid spraying high-pressure water directly into door gaps because most shower enclosures are designed to control ordinary water flow, not concentrated spray.
Inspect the bottom edge, corners and junctions with fixed panels. Check whether the drip rail returns water to the enclosure.
If water still escapes, determine whether it passes beneath the sweep, around its end or through another opening.
Which Way Should a Shower Door Sweep Face?
The drip rail and water-directing fin should normally face the inside of the shower. This position allows water running down the glass to return to the shower base.
Some sweeps have two fins or a symmetrical profile, so their orientation may be less obvious. Examine the old sweep, the product profile and the position of the threshold before installation.
The sweep should not direct water toward the bathroom floor or prevent the door from closing.
Can You Replace a Shower Door Sweep Without Removing the Door?
Most snap-on and slide-on sweeps can be replaced while the shower door remains installed. The door only needs enough clearance for the old sweep to be removed and the new one positioned safely.
Door removal may be necessary when:
- A wall or fixed panel blocks side access
- The sweep is secured inside a metal frame
- The door cannot remain stable while open
- The bottom edge is difficult to reach
- Hinges or other hardware also require repair
Frameless glass doors can be heavy. Removing one without suitable support and experience can damage the glass, hinges or surrounding surfaces.
Common Shower Door Sweep Replacement Mistakes
Buying the Wrong Channel Size
Glass thickness determines whether the sweep grips the door. A profile that looks correct may still have an incompatible channel.
Always measure the glass instead of estimating its thickness.
Ignoring the Gap Size
The sweep may fit the glass but still fail to reach the threshold. Measure both the glass and the gap before selecting a replacement.
Installing the Sweep Backwards
A reversed drip rail can send water toward the bathroom. Confirm the orientation before pressing the channel fully into place.
Cutting the Sweep Too Short
Even a small opening near the edge of the door can allow water through. Measure twice before cutting.
Using Excessive Force
A sweep that requires heavy impact may be the wrong size. Striking or twisting a channel against tempered glass can damage the glass edge.
Using Adhesive Unnecessarily
Most frameless snap-on sweeps rely on a correctly sized friction-fit channel. Adhesive can make future replacement more difficult and may not solve a poor fit.
Expecting the Sweep to Correct Door Misalignment
A new sweep cannot repair loose hinges, a sagging door or an uneven frame. The door should be adjusted before fitting a new seal.
Why Does the Shower Door Still Leak After Replacing the Sweep?
A new sweep may not stop the leak if the water is coming from another location.
Possible causes include:
- Incorrect sweep profile
- Insufficient fin length
- Sweep installed backwards
- Door out of alignment
- Loose or damaged hinges
- Failed silicone around the curb
- Threshold sloping toward the bathroom
- An open gap near the wall or fixed panel
- Water directed forcefully at the door
- A missing vertical seal
- Damaged bottom guide on a sliding door
Custom shower enclosures require the glass, hardware, seals, curb and drainage surfaces to work together. Inspecting only the bottom sweep may overlook the actual source of the leak.
How to Maintain a New Shower Door Sweep
Clean the sweep regularly with a mild, non-abrasive cleaner. Soap residue and mineral buildup can make the flexible material stiff or prevent the fins from sitting correctly.
After cleaning, rinse the profile and wipe it dry. Avoid harsh chemicals or abrasive pads that can cloud or damage clear vinyl.
Check the sweep periodically for movement, cracking and loss of contact. Early adjustment can prevent a loose channel from falling off or allowing repeated water exposure outside the enclosure.
When Should You Contact a Glass Professional?
Professional inspection may be appropriate when:
- The glass edge is chipped
- The shower door is sagging
- Hinges or brackets are loose
- The door strikes a fixed panel
- The replacement sweep does not stay attached
- Water is entering around the frame or curb
- The door must be removed for access
- The required profile cannot be identified
- The enclosure uses specialised commercial hardware
A damaged glass edge should not be covered by a new sweep without assessment. Daltex Glass evaluates the complete enclosure when glass repair involves damaged doors, panels or supporting hardware.
Frequently Asked Questions
How do I know which shower door sweep to buy?
Measure the glass thickness, door width and gap beneath the door. Compare the old profile with the new channel, fins and drip rail. Also confirm whether the door is framed, frameless, swinging or sliding.
Are shower door sweeps universal?
No. Shower door sweeps vary by glass thickness, channel size, profile, fin length, door type and installation method.
Can I cut a shower door sweep to fit?
Yes. Most vinyl and PVC sweeps can be trimmed to length using a suitable cutting tool. Make a straight cut and smooth any rough edges before installation.
How tight should a shower door sweep be?
The channel should grip the glass securely without requiring excessive force. The flexible fin should lightly contact the threshold without making the door difficult to move.
Which way does the shower door sweep go?
The drip rail or main water-directing fin should normally face the shower interior. This helps return water running down the glass to the shower base.
Do I need to remove the shower door?
Usually not. Many frameless sweeps can be pulled or slid from the glass while the door remains installed. Some framed systems require additional disassembly.
Should I glue the sweep to the glass?
Most snap-on sweeps do not require adhesive. Use adhesive only when it is specified for the particular product and installation.
How often should a shower door sweep be replaced?
There is no fixed replacement schedule. Replace it when it becomes cracked, brittle, loose, permanently distorted or unable to control water.
Why is the new sweep difficult to install?
The channel may be too small for the glass, the glass edge may still have residue, or the sweep may need to be installed from the side. Confirm the measurements before applying more pressure.
Can a shower door sweep stop every leak?
No. A sweep controls water at the bottom of the door. It cannot correct leaks caused by failed silicone, misaligned glass, damaged hardware, open vertical gaps or an incorrectly sloped threshold.
Final Takeaway
To replace a shower door sweep successfully, identify the correct profile, measure the glass and bottom gap accurately, remove the old seal carefully, and clean the glass before installing the replacement.
Cut the new sweep to the full door width, position the drip rail toward the shower interior and press or slide the channel evenly onto the glass. The fin should lightly contact the threshold while allowing the door to move smoothly.
If the new sweep does not stop the leak, inspect the door alignment, vertical seals, curb, hardware and surrounding silicone before assuming the replacement part is defective.


